
Getting a procedure approved by insurance sounds simple. It rarely is. Before a payer agrees to cover certain services, it wants proof, and every plan asks that proof a little differently. That approval step is the prior authorization process.
When notes are incomplete or payer rules get missed, the request stalls, and patients and staff both wait. Many teams also ask, what is pre-authorization, and how is it different from precertification? This guide explains it in plain words, from the basic terms to the steps, and then shows how it fits into billing and revenue.
Key Takeaways
- Every payer sets its own rules, forms, and timelines.
- Verify coverage and gather complete notes before you submit.
- Track every request and give each one a single owner.
- Approval isn’t a payment guarantee, so check the rest before you bill.
- In short, prior authorization is approval from the payer before certain care.
What Is Pre-Authorization? The Simple Answer for Busy Practices
So, what is pre-authorization? It’s your health plan yes before a patient gets certain procedures, tests, or services. The insurer wants proof that the care is covered and medically necessary before it agrees to pay.
Plans often ask for it on higher cost or higher risk care, like surgeries, advanced imaging, and some medications. Your front desk, clinical staff, and billing team all touch the request, and each payer sets its own prior authorization requirements. If one team drops the ball, the whole request stalls. That’s why you need to know what pre-authorization before the next patient’s books is.
Precertification in Health Insurance
Precertification is the same kind of approval, just wearing a different name tag. Some insurers use it for the review they run before a planned hospital stay or procedure.
The payer checks your request against its own rules, then says yes or no. For example, one plan says precertification, while another says preauthorization. It’s the same idea with a different word, so always read the payer’s own wording before you submit anything. That way, you know exactly what the plan is asking for, and your team doesn’t guess.
Precertification vs. Preauthorization: Key Differences
The difference between precertification and preauthorization depends on the payer, and so does what each term covers. Here’s a quick side by side.
| | Precertification | Preauthorization |
| Common meaning | Approval or review before planned care | Approval before a service is given |
| Who uses the term | Some payers use this one | Some payers use this one |
| Care it covers | Depends on the payer. May apply to inpatient or outpatient services, procedures, tests, medications, or other types of care. | Depends on the payer. May apply to inpatient or outpatient services, procedures, tests, medications, or other types of care. |
| Details usually needed | Clinical notes, plus planned dates or codes | Clinical notes, provider order, and codes |
| Where to confirm | The payer’s own list or portal | The payer’s own list or portal |
Each insurer names things its own way, so the plan’s prior authorization requirements matter more than the label. Don’t assume one term means inpatient and the other means outpatient. Some payers split them that way, and many don’t. A one-page cheat sheet at your front desk keeps everyone on the same page.
The Prior Authorization Process: A Step-by-Step Guide
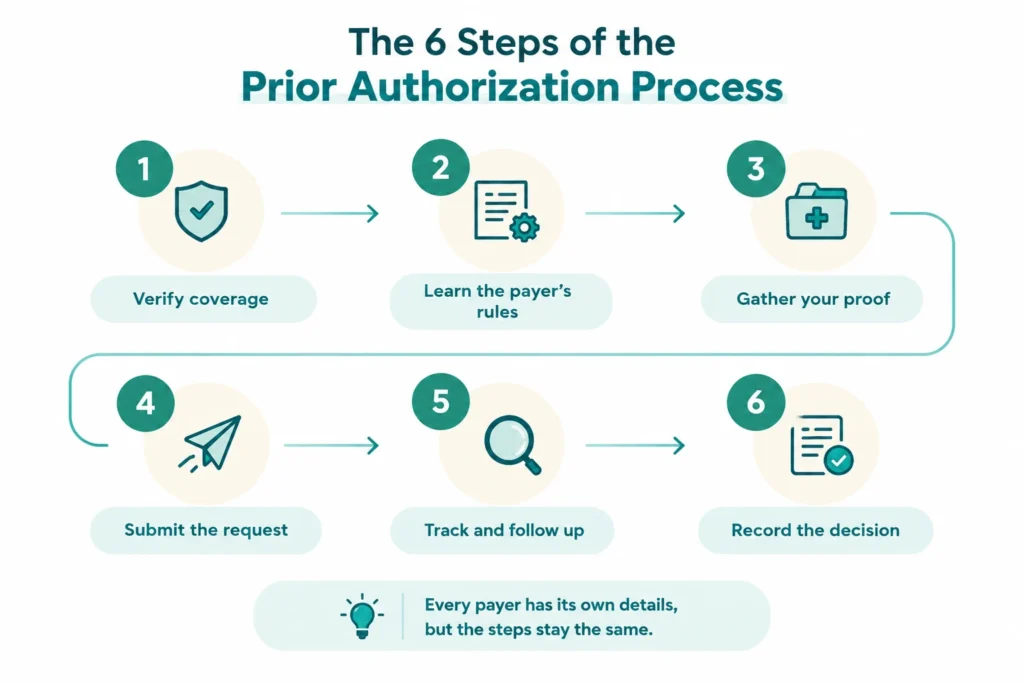
The prior authorization process follows a common sequence, but each payer may have different requirements, submission methods, and review timelines. You check coverage, learn the rules, gather your proof, send the request, follow up, and write down the answer. Skip one, and the request usually comes back.
Here’s how the process works step by step.
Step 1. Verify Insurance Eligibility and Benefits
Start with the basics: does your patient actually have coverage? Run insurance eligibility verification first. Check that the plan is active on the date of service, what it covers for this procedure, and whether you even need authorization.
Two minutes of insurance eligibility verification at scheduling can save you a week of rework.
Step 2. Confirm Procedure Specific Requirements
Think of this step as homework. Every payer wants something a little different, so look up its prior authorization requirements for your exact procedure. Check the covered codes, the forms, the clinical rules, and where the request goes.
Don’t trust last month’s process, because payers change things. Note each payer’s prior authorization requirements as you go, and your next request moves faster.
Step 3. Prepare Medical Necessity Documentation
Why does this patient need the procedure? That’s the one question every payer cares about. Pull the clinical notes, the provider’s order, test results, and any imaging. If simpler treatments were tried first, say so. Payers look for that.
Good medical necessity documentation reads like a short story with a clear point. Weak medical necessity documentation? It bounces back asking for more, and your clock restarts. Painful.
Step 4. Submit the Authorization Request
Now send it, all in one go. Here’s how to submit a prior authorization request without a second trip: use the channel the payer wants, fill every field, and attach all your records at once. Then check the name, date of birth, member ID, and codes. One typo can undo the whole thing.
Write down the reference number and put it where your team can find it. Without it, you can’t ask about the request later.
Step 5. Track the Request and Follow Up
Sent it? Don’t walk away. Knowing how to check prior authorization status matters as much as sending the request. Log into the payer portal, or call with your reference number, and note what’s still pending.
If the payer asks for more information, answer fast. Then give one person the job of following up. Otherwise, requests slip through the cracks, and nobody notices until the patient calls. That’s why one clear owner for each request saves your team a lot of stress.
Step 6. Document the Final Decision
Now for the last step: make sure to write down the outcome. Record whether it’s an approval or denial, the authorization number, the approved dates, and any specific conditions. Let the scheduling and billing teams know right away.
If you receive a denial, be sure to note the reason and your next steps, whether that’s a peer review, an appeal, or a corrected resubmission. Don’t let that decision just sit in someone’s inbox!
How to Check Prior Authorization Status Without the Hold Music
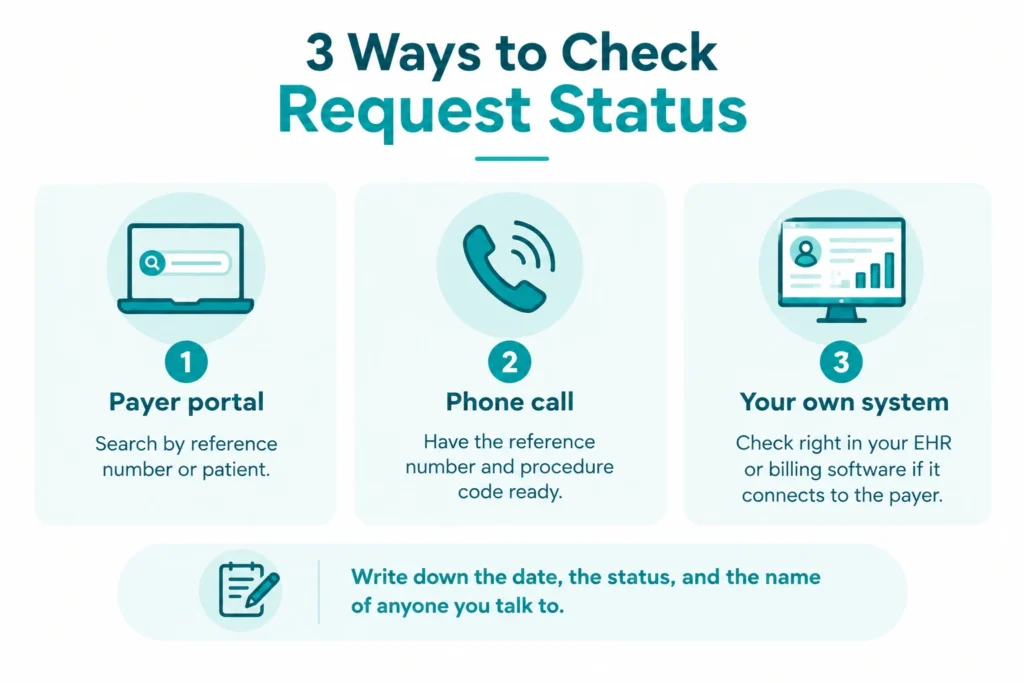
Sent a request and heard nothing? You have three easy ways to find out where it stands:
- The payer portal. Search by reference number or patient.
- A phone call. Call the payer’s provider line with your reference number and procedure code handy.
- Your own system. If your EHR or billing software connects to the payer, check right there.
Write down the date, the status, and the name of anyone you talk to. If it says pending, ask what’s missing. Knowing how to check prior authorization status helps you catch a stalled request before the surgery date gets close.
Your Quick Prior Authorization Checklist
Want a cheat sheet your team can tape to a monitor? Run through this list before you hit submit, every single time:
- Coverage is active on the date of service
- The payer says authorization is required
- Notes, orders, and test results are attached
- Name, date of birth, and member ID match the insurance card
- One person owns the request
Miss a box? Fix it before you send. Five minutes with this list beats five days of back and forth. Here’s how to avoid prior authorization delays when the schedule gets busy: use the list, every time.
Why Your Requests Keep Stalling: Common Causes of Authorization Delays
Most delays come from small problems you can fix:
- Incomplete clinical notes
- A wrong member ID or date of birth
- Follow up calls nobody made
- Unclear ownership between front desk, clinical, and billing
Here’s how to avoid prior authorization delays:
- Use a checklist for every request
- Name one owner per case
- Review your open requests every day
- Send strong medical necessity documentation the first time
Small habits beat big cleanups. That’s how to avoid prior authorization delays for the long run.
Electronic Prior Authorization and Workflow Efficiency
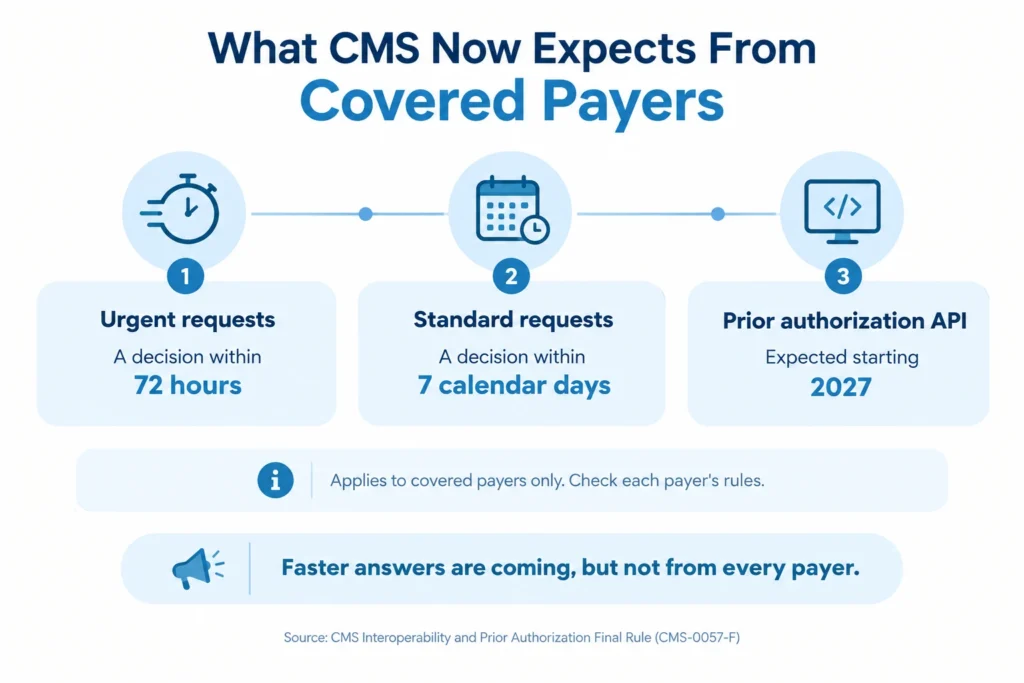
Electronic prior authorization is moving toward more connected workflows between healthcare providers, electronic health record (EHR) systems, and health plans. Under CMS’s Interoperability and Prior Authorization Final Rule (CMS-0057-F), certain health plans must implement specified prior authorization APIs beginning in 2027.
Requirements vary by payer type and authorization category, so practices should confirm which rules apply to their health plans. Read CMS’s electronic prior authorization guidance.
Prior Authorization in the Medical Billing Workflow
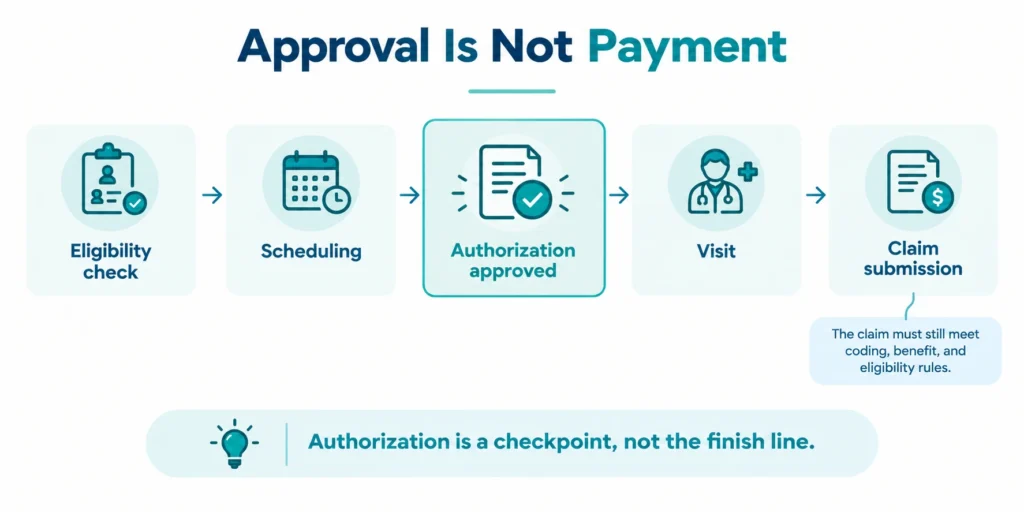
Authorization sits in the middle of your medical billing workflow. It connects eligibility checks, scheduling, the visit, and claim submission.
Record the authorization number, approved dates, and approved services in the patient’s account, so your claim matches what the payer approved. That way, nothing surprises your team at claim time.
One hard truth: approval doesn’t guarantee payment. Your claim still has to meet coding, benefit, and eligibility rules. A clean medical billing workflow treats authorization as one checkpoint, not the finish line.
The Impact on Healthcare Revenue Cycle Management
Authorization problems rarely stay small. Later, they show up as denials, rework, and slow payments. So if you run revenue cycle management healthcare operations, you feel it first. But the cause usually starts at the front desk.
Good insurance eligibility verification up front supports your whole revenue cycle. Integrate Point’s Insurance Verification service helps you check coverage and benefits before a visit is booked. For revenue cycle management healthcare leaders, that’s the quiet win.
What We’ve Seen Work in Real Practices
Our team at Integrate Point sees the same pattern in most practices. A smooth prior authorization process starts when someone checks coverage first, collects complete notes before sending, and follows up on every request. Write down what each payer needs and give every request one owner. Simple habits like these prevent most avoidable delays.
No. Requirements depend on the payer, the plan, the service, and the care setting. One insurer may require approval for a knee replacement while another doesn’t. Check the payer’s current list or portal before you schedule, every time, because rules change.
Your claim will likely be denied. Depending on the payer contract and plan rules, your practice may absorb the cost, or the patient may get the bill. Some payers allow review after the fact in limited cases. Confirm the requirement before you schedule.
It varies by payer, request type, and how complete your documentation is. A clean request often moves faster, while one missing a note can sit pending for days. Ask each payer for its standard time frame and track every request against it.
Read the denial reason first. It usually points to missing information, a coding issue, or a medical necessity question. Fix what you can, add the missing records, and follow the payer’s appeal process before its deadline. Some denials get overturned once the right information is on file.
Start with electronic submission and one tracking dashboard, so every request has a status and an owner. Add coverage checks before you schedule and a checklist before you submit. Software works best when your data is clean, so fix the basics first. Then ask each payer which electronic channels it accepts.
No. Approval means the payer agrees the service meets its criteria, but your claim still must pass other checks. Coverage must be active, benefits must apply, and coding must match what was approved. Treat approval as one checkpoint.
Stop Chasing Approvals: Your Next Step on Prior Authorization
A smoother prior authorization process starts with four habits. Check coverage first, gather complete notes, follow up on every request, and give each one a clear owner. Build those in, and you cut your delays, denials, and rework.
Then pick one step and start this week. If you’d rather hand the work off, Integrate Point can handle your insurance verification and prior authorizations, so your team spends less time chasing approvals and more time with patients. Contact us today, and we’ll look at where your requests get stuck.